
Generally, every class you write in Java is made up of two components: attributes and behavior. In this section, you'll learn about each component as it applies to a theoretical class called Jabberwock. To complete this section, you'll create the Java code to implement a representation of a jabberwock -- a dragonlike monster from the Lewis Carroll poem Jabberwocky.
Attributes are the individual things that differentiate one object from another and determine the appearance, state, or other qualities of that object. Consider how a theoretical class called Jabberwock could be created. The attributes of a jabberwock might include the following:
Attributes of an object also can include other information about its state. For example, you could have features for the jabberwock's attitude (enraged or calm) or its current health (alive or dead).
Attributes are defined by variables; in fact, you can consider them analogous to global variables for the entire object. Because each instance of a class can have different values for its variables, each variable is called an instance variable. Instance variables define the attributes of an object. The class defines the type of the attribute, and each instance stores its own value for that attribute.
Each attribute, as the term is used here, has a single corresponding instance variable; changing the value of a variable changes the attribute of that object. Instance variables may be set when an object is created and stay constant throughout the life of the object, or they may be able to change at will as the program runs.
Class variables apply to the class itself and to all of its instances. Unlike instance variables, whose values are stored in the instance, class variable values are stored in the class itself. You will learn about class variables in another lesson during Week 1.
Behavior is the only way that objects can do anything to themselves or have anything done to them. The behavior of a class determines what instances of that class do to change their internal state. It also determines what class instances do when asked to do something by another class or object. For example, the Jabberwock class might have some of these behaviors:
To define an object's behavior, you create methods. Methods are just like functions in other languages, but they are defined inside classes. Methods operate on instances of their class. Java does not have functions of any kind defined outside of classes (unlike C++).
Although methods operate within their own class, methods do not affect only a single object. Objects communicate with each other using methods. A class or object can call methods in another class or object to communicate changes in the environment or to ask that an object change its state.
For example, consider the swordsman in the poem Jabberwocky. When he attacked the jabberwock with his vorpal blade, here's what happened:
"One, two! One, two! And through and through
The vorpal blade went snicker-snack!
He left it dead, and with its head
He went galumphing back."
In Java, the swordsman could be created as a Knight object. When the swordsman chops the head off the jabberwock, it definitely causes a change in the jabberwock's internal state. The Knight object would use a method to tell the Jabberwock object, "I chopped your head off. You're dead."
Just as there are instance and class variables, there are also instance and class methods. Instance methods (which are so common they're usually just called methods) apply and operate on an instance of a class. Class methods apply and operate on a class itself. You'll learn more about class methods later on.
Up to this point, today's lesson has been pretty theoretical. In this section, you'll create a working example of the Jabberwock class so that you can see how instance variables and methods are defined in a class. You also will create a Java applet that creates a new instance of the Jabberwock class, displays its instance variables, and modifies one of its instance variables. Before diving into the Jabberwock example, however, you will get more acquainted with the features of the Portfolio Manager in Java WorkShop.
Note: The syntax of this example will not be covered in great detail. Don't worry too much if you're not completely sure what's going on. All you need to focus on in this example are the basic parts of the Jabberwock class definition.
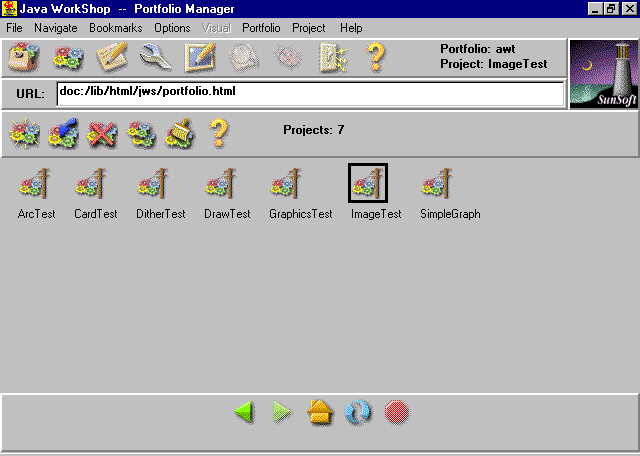
To start, get into Java WorkShop and click the Portfolio Manager icon on the WorkShop command toolbar, as shown above. You should see the icons and names of all projects that you have created [example Portfolio Manager screen].
Tip: Before choosing any options, put your cursor above any of the six icons on the Portfolio Manager toolbar. (It is the toolbar located between the list of current projects and the Java WorkShop command toolbar). On many of the toolbars in Java WorkShop, you can find out about an icon by holding your mouse over it without clicking. A line of text will appear at the lower left corner of the screen describing what the icon does. To see this in action, slowly drag your mouse over each of the icons in the Portfolio Manager toolbar.
The two features of Portfolio Manager that you will use most often are Create a New Project and Remove the Selected Project. One useful command that is not on the Portfolio Manager toolbar is the Choose command on the Portfolio pull-down menu. You can use this command to switch from your personal portfolio to another portfolio.
Two read-only portfolios come with WorkShop: jdk and awt. Use the Choose command to see one of these portfolios. These portfolios contain projects that have an unusual icon -- the familiar "puzzle-piece" icon connected to a telephone pole. The telephone pole signifies that the applet is located on an Internet site instead of a directory on your system. You can use the Project Tester to run these applets as if they were stored on your own system [example of the awt Portfolio Manager screen].
In addition to running applets, you can import portfolios and projects from other sites on the Internet. This feature highlights one of the noteworthy features of Java WorkShop: It can use data from Web pages as easily as it uses data from your hard drive. When you're done running the applets available from other portfolios, use the Choose command from the Portfolio pull-down menu to return to your personal portfolio so that you can create a new project.
Your next project will be an applet that creates and uses a Jabberwock class. The applet will be named JabberwockApplet to distinguish it from the Jabberwock class. On the Portfolio Manager toolbar, click the Create a New Project icon. A screen of tabbed dialog boxes will appear with the Applet tab visible in front. (If it isn't visible, click the Applet tab, and it will move forward.) Fill in the dialog box with the following fields:
When you're done, click the Apply button. The project will be created, and a Source Editor window will open on your system where you can enter the source code for JabberwockApplet.java. Make the Source Editor the active window on your system and delete all of the starting text that WorkShop has placed in the editing area.
You start by creating a basic class definition. Enter the following:
class Jabberwock {


}
Congratulations! You now have designed a class. Of course, it doesn't do much at the moment, but that's a Java class at its simplest.
To make Jabberwock more sophisticated, create three instance variables
for this class. Just below the class Jabberwock { line, add the following
three lines: String color;
String sex;
boolean hungry;
These lines create three instance variables. Two, color and sex, can contain String objects. (String is part of that standard class library mentioned earlier.) The third, hungry, is a boolean that refers to whether the jabberwock is hungry (true) or full (false).
Note: In Java, boolean is a real data type that can have the values true or false. Unlike C, booleans are not numbers.
You can add some behavior to the class by adding methods. There are all kinds
of things a jabberwock can do (claws that bite, jaws that catch, and so on), but
to keep things short, just add one method -- a method to feed the monster. Add
the following lines below the three instance variables in your class definition:
void feedJabberwock(Graphics g, int y) {
if (hungry == true) {
g.drawString("Yum -- a peasant!", 25, y);
hungry = false;
} else
g.drawString("No, thanks -- already ate.", 25, y);
}
// more to come
Note: The last line, // more to come, is a comment line. Comments are used for the benefit of programmers looking at source code to figure out what it's doing. Everything from the initial // to the end of the line will be ignored by the compiler. In this case, the comment is being used as a placeholder. You'll replace it soon.
The feedJabberwock method tests to see whether the jabberwock is
hungry (in the line if (hungry == true) {. If it is hungry, the
jabberwock is fed (much to its delight), and the state of hungry is
changed to false. If the jabberwock is not hungry, a message is displayed
that the monster already ate. Here's what your program should look like so far:
class Jabberwock {
String color;
String sex;
boolean hungry;
void feedJabberwock(Graphics g, int y) {
if (hungry == true) {
g.drawString("Yum -- a peasant!", 25, y);
hungry = false;
} else
g.drawString("No, thanks -- already ate.", 25, y);
}
// more to come
}
Note: The indentation of each part of the class isn't important to the Java compiler. Using some form of indentation, however, makes your class definition easier to read. This readability pays dividends when you or another programmer tries later on to figure out what the code is doing. The indentation used here, with instance variables and methods indented from the class definition, is the style used throughout this book. The Java class libraries use a similar indentation. You can choose any indentation style that you like.
Before you compile this class, you need to add one more method. The showAtts
method displays the current values of the instance variables in an instance of
your Jabberwock class. In the program, delete the comment line // more
to come and replace it with the following:
void showAtts(Graphics g, int y) {
g.drawString("This is a " + sex + " " + color
+ " jabberwock.", 25, y);
if (hungry == true)
g.drawString("The jabberwock is hungry.", 25, y+20);
else
g.drawString("The jabberwock is full.", 25, y+20);
}
The showAtts method displays two lines to the screen: the sex and color of the Jabberwock object, and whether the monster is hungry. Save the source code file by clicking the diskette icon or choosing File | Save.
At this point, you have a Jabberwock class and methods that can be used to modify or display its instance variables. To do something with the class (for example, to create instances of that class and play with them, create the code for a Java applet that uses Jabberwock.
The listing below shows the full source code for Jabberwock.java. Return to the Source Editor and enter lines 1 through 20 in front of the source code you already have entered. When you're done, save the program.
Caution: It is important to note that Java is case-sensitive. In this example, if you enter g.drawstring as a method name instead of g.drawString, it will result as a compiler error because drawstring will not be found in the java.awt.Graphics class.
Listing: JabberwockApplet.java.
1: import java.awt.Graphics;
2:
3: public class JabberwockApplet extends java.applet.Applet {
4:
5: public void paint(Graphics g) {
6: Jabberwock j = new Jabberwock();
7: j.color = "orange";
8: j.sex = "male";
9: j.hungry = true;
10: g.drawString("Calling showAtts ...", 5, 50);
11: j.showAtts(g, 70);
12: g.drawString("Feeding the jabberwock ...", 5, 110);
13: j.feedJabberwock(g, 130);
14: g.drawString("Calling showAtts ...", 5, 150);
15: j.showAtts(g, 170);
16: g.drawString("Feeding the jabberwock ...", 5, 210);
17: j.feedJabberwock(g, 230);
18: }
19: }
20:
21: class Jabberwock {
22: String color;
23: String sex;
24: boolean hungry;
25:
26: void feedJabberwock(Graphics g, int y) {
27: if (hungry == true) {
28: g.drawString("Yum -- a peasant!", 25, y);
29: hungry = false;
30: } else
31: g.drawString("No, thanks -- already ate.", 25, y);
32: }
33:
34: void showAtts(Graphics g, int y) {
35: g.drawString("This is a " + sex + " " + color
36: + " jabberwock.", 25, y);
37: if (hungry == true)
38: g.drawString("The jabberwock is hungry.", 25, y+20);
39: else
40: g.drawString("The jabberwock is full.", 25, y+20);
41: }
42: }
Before you can test the applet, you need to compile it with the Build Manager. Return to the main Java WorkShop window. JabberwockApplet should be listed in the current project field in the upper right corner of the screen. (If it isn't, use the Portfolio Manager to make JabberwockApplet the current project). Click the Build Manager icon (the wrench) on the WorkShop command toolbar to bring up the Build Manager options.
To compile JabberwockApplet.java, click the Build All Files icon on the Build Manager toolbar. It's the pair of wrenches side-by-side. If the source code has been entered correctly, you will see the message Done. to show that the compilation was a success.
Though most of the code in the Jabberwock class definition has been described, the contents of the JabberwockApplet class in the listing are largely new to you. The lines that involve the Jabberwock class will be explained more fully to give you an idea of how classes are used.
Line 6, Jabberwock j = new Jabberwock(), creates a new instance of the Jabberwock class and stores a reference to it in the variable j. Remember that you usually do not operate directly on classes in your Java programs. Instead, you create objects from those classes and call methods in those objects. Lines 7, 8, and 9 set the instance variables for the Jabberwock object j. The color is set to orange, the sex is set to male, and the hungry boolean instance variable is set to true.
Line 11 calls the showAtts method, defined in your Jabberwock object, with the parameters (g, 70). (The parameters used here and elsewhere in the program determine where text will be displayed in the applet. Disregard them for now.) The showAtts() method displays the values of the instance variables sex and color for the Jabberwock object j. It also displays the value of the instance variable hungry.
Line 13 calls the feedJabberwock() method in Jabberwock to feed object j. Jabberwock object j is hungry when the applet starts because hungry initially is set to true, so the object eats the food. As you saw in the feedJabberwock() method described previously, the instance variable hungry is set to false after the Jabberwock object eats.
Line 15 calls the showAtts() method again, displaying the values of the instance variables for a second time. A change in state for hungry is shown. Line 17 tries to feed the jabberwock again to see what happens. Because Jabberwock object j is no longer hungry, the object refuses to eat the food.
Now that you have become familiar with what the program is doing, click the Project Tester icon on the WorkShop command toolbar to run JabberwockApplet. The output should look like the following: